Sunday, March 31, 2013

March tag!

I finally got around to making my March tag for Tim Holtz 12 tags of 2013. If you don't know about Tim's  12 tags check it out here: http://timholtz.com/12-tags-of-2013-march/
I didn't have a lot of the supplies that he uses so I made do with what I have. the bunny die, so I found a picture of a bunny on line, printed it, traced it onto my labels die and cut it out. I also didn't have the tinsel twine, so I used glitter for my bunnies. Instead of the tapered fringe die I used my Martha Stewart scissors.  I also didn't use the metal flowers and substituted other small flowers from my stash. I really had a good time making these tags, let me know what you think! I love your comments!!


Saturday, March 23, 2013

MY FIRST MIXED MEDIA CANVAS

I have been watching video's on You tube of different people doing mixed media canvas's. One persons video's really stood out to me, Leanne Luvleescrappin on you tube. I really like the stuff she does and thought I would give it a try.
First I applied Gesso to my canvas. I added my pictures (one of my daughters senior pictures and then I thought it would be fun to add one of my senior pictures.) Yes that is me 36 years ago, Wow! Where has the time gone? When we went for my daughters senior pictures, I thought it was funny that they took her picture by some trees, I told her that when I had mine taken (many moons ago)  I also had one by a tree.
Next I added some lace, and then I started with modeling paste. I used some dylusions stencils and some plastic mesh and applied the paste. Next I added some of Tim Holtz Alpha Parts for my title. The family plaque was something I had picked up at Michael's along time ago. Next I added some flowers from I am Roses and some Prima flowers. I added a hinge, some Tim Holtz items, locket keys, ornate plate ( with a saying I printed off my computer) some pen nibs and a few other misc. metal items.
I then took the Gesso and went over the whole thing. As you can see by the pictures, I think I got carried away with the Gesso on the flowers. They were way to stiff and after I started spraying I decided I didn't like them so I cut them off the canvas.
Next I started spraying different Glimmer Mists, by tattered Angels. I wasn't liking the looks of my canvas at all, but it got better the more I played around.
After I got a color I was somewhat happy with, I added my I am roses flowers and leaves that I had misted with the Glimmer Mist. I liked them better this time without the Gesso making them stiff.
Still not quite satisfied, I took some different distress inks and went over my letters. I also put some Vintage Photo re-inker and added water in a spray bottle and spritzed it more. Lastly I added the Tim Holtz clock face and hands on top of a piece of cork I had in my stash.
I found it very difficult to get good pictures of this, this is the best I could do.


The canvas is not quite what I had pictured, but I guess for my first try it is ok. What do you think, what does it need? Leave me a comment and make my day! Shari

Sunday, March 10, 2013

Steampunk meets classy egg!

Welcome to my new followers!
I decided to try something a little different. I started out with a porcelain egg,  these have been in my stash of goodies but I'm sure you can still buy them at your local Michaels. I took silver metal tape ( I think it is used for duct work.) and embossed it with Sizzix texture fade, steam punk. I cut the tape into pieces and applied it to the egg. This tape is adhesive backed so it made covering the egg easy. I then took pitch black Adirandack paint dabber and painted the whole surface. When it was almost dry I took a soft cloth and wiped off the paint, leaving the black in all the cracks. I saw this technique on http://thelittleshabbyshed.blogspot.com/2013/03/tattered-floral-challenge.html Kaz made a fabulous dressform using this technique.
Now to embellish the egg, I added a TH ornate plate to the front, bending it to conform to the egg. I put a piece of black vinyl behind the plate so my flourish I added would stand out. The flourish is from Michaels, bead landing charms. The crown I added and the flourish were in the same pkg. I added a set of TH Idea-ology wings to each side sandwiched together.


I was looking for a base to put the egg on and found a wood stand but didn't like the way it looked. I decided to give it a classy look and took an old crystal candle stick to use as my base. Kind of a weird miss match, but I liked the looks of it. I used some hug and snug seam binding and colored it with black soot distress ink and made a bow.  I then added a charm, I thought about putting more gears all over the egg but thought maybe it would be too much. What do you think, does it need more embellishing? Remember, I love your comments they brighten my day. Shari

Wednesday, March 6, 2013

Shabby Chic Topiary

I've been racking my brain trying to figure out something different to do for Tim Holtz Tattered Floral Challenge. If you haven't been to Tim's blog, go now, he has a challenge going on right now and is giving away some Awesome prizes. http://timholtz.com/tattered-floral-challenge/
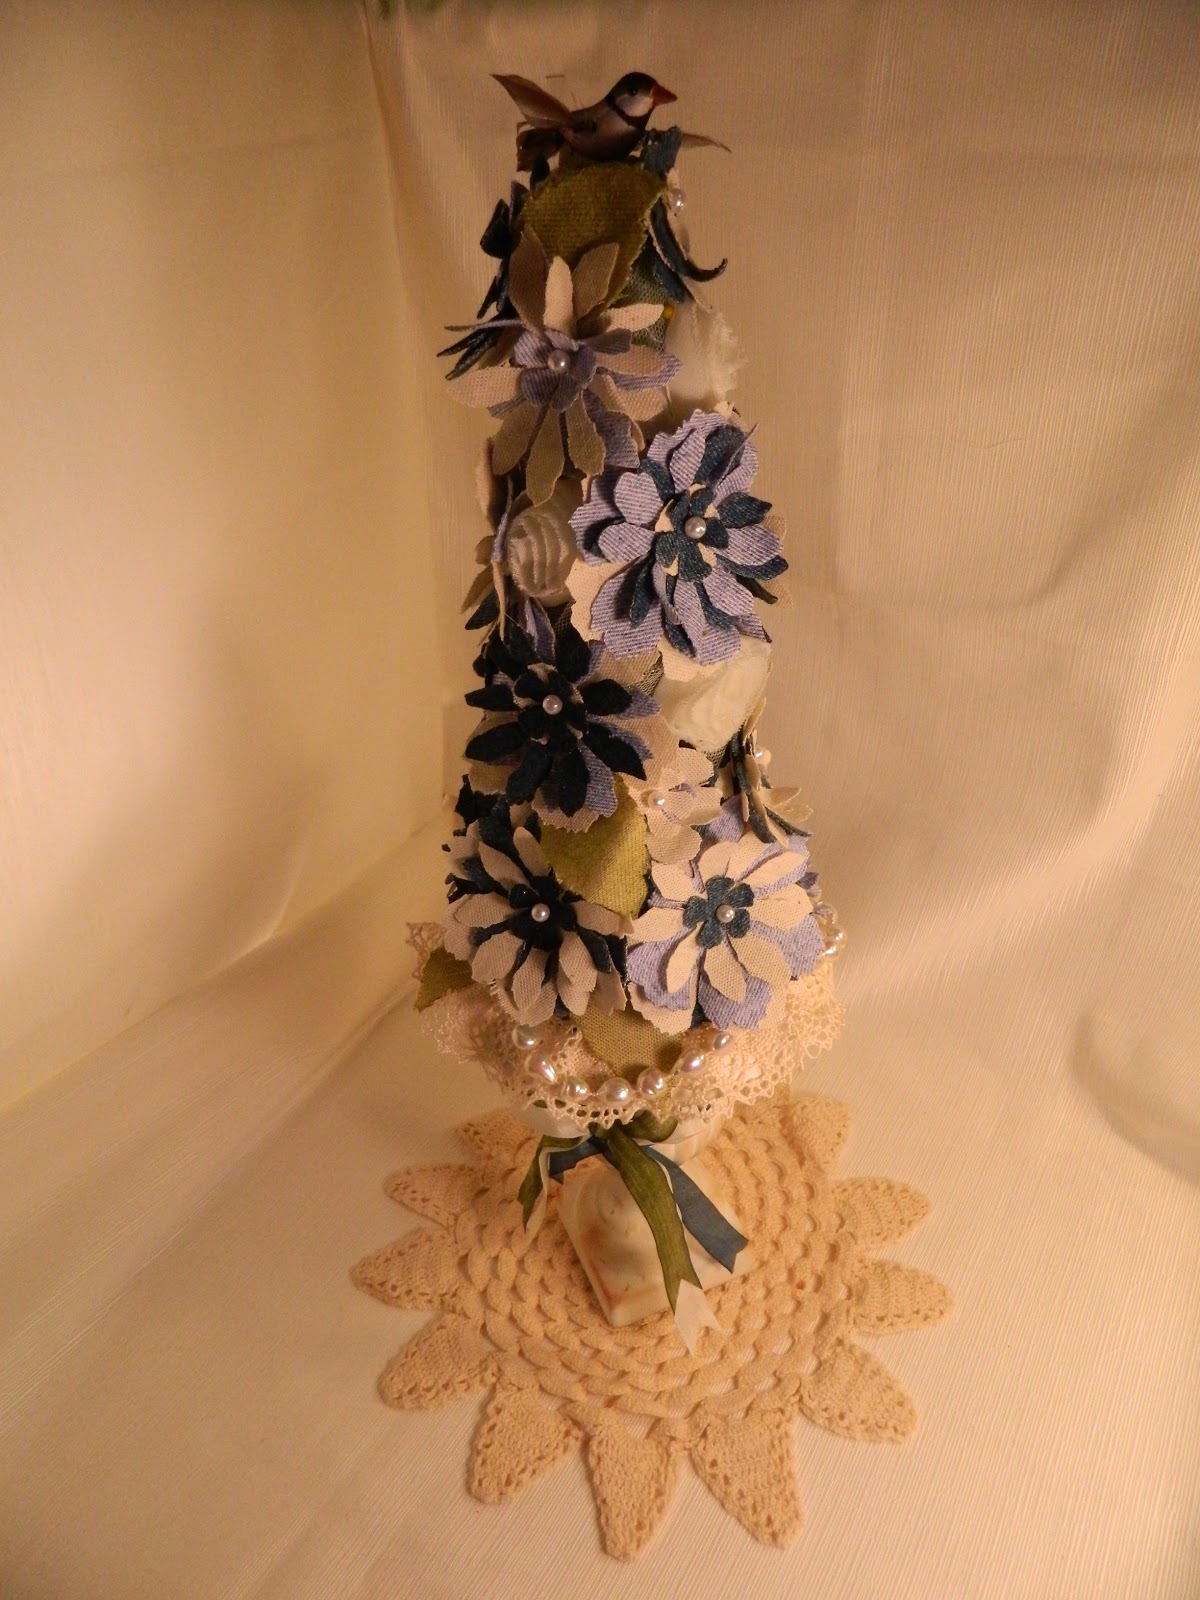
I came up with the idea to do a topiary type shabby chic tree. I made all the flowers with Tims tattered floral die and use different color BLUE JEANS  and canvas to make each flower. I took a hat pin and went thru the center of the flower and poked it into a styrofoam cone. I also used Tims tattered laves die and some canvas, and inked them with distress ink  I added lace,  pearls and a few frog flowers to make it look more shabby chic. Thanks to my vegabond, all the cutting was easy. I actually did all the cutting while watching my favorite u-stream show with Jim The Gentleman Crafter. That man is so entertaining, he makes my Tuesday. Check him out at: http://thegentlemancrafter.blogspot.com/
Let me know if you like my topiary! I love it when you leave me comments, it brightens my day!!!!