I finally decided to join in on the Art Journaling everyone is doing these days. A couple of weeks ago I bought Dyan Reaverley's Dylusions Creative Journal.
I watch Jim, The Gentleman Crafter and Shari Carroll from http://simonsaysstampblog.blogspot.com/2013/06/shari-carroll-june-installment-of-art.html do these awesome journaling pages and always wanted to try one.
Tonight I got up the courage to attempt my first art journaling.
I first took Mod Podge and covered my pages with Tim Holtz tissue paper. Once that was dry I started applying TH Distress Inks. I used Mustard Seed, Ripe Persimmon and Peacock Feathers.
I used some stencils and some modeling paste in different areas. I cut out the dress form out of chipboard and made a stencil. I also used modeling paste for this. To dress her up, I added some burlap fringe for a skirt with a pearl brad for a belt. Some flat back pearls for a necklace and two metal flowers with flat back pearls in the center for her bra. I used some chipboard wings and covered them with rub n buff and stamped a pattern onto them.
I then used some TH and Dylusions stamps and began stamping randomly.
I'm pretty happy with how my first attempt at art journaling turned out, and I definitely will be doing more. What do you think, I love your comments!
Tuesday, June 18, 2013
Tuesday, May 28, 2013
I finally got to meet Tim Holtz!
Mothers Day weekend my wonderful daughter took me to the Great Lakes Mega Meet in Novi Michigan. I've always wanted to meet Tim Holtz , I had heard what a great guy he is, and what a great teacher. Well he was all that, and more!
We sat andwatched him demo for hours, my daughter was a great sport and did whatever I wanted to do. He made us each a fragment charm and signed the back. I got one of the tags he made, signed, a metal tape demo he made, and he signed my TH bags.

Ibought many products from the Stampers Anonymous Booth and had two days of heaven. Deni bought me a beautiful necklace with charms inside from South Hill Designs. Thanks so much Deni Lynn for a memorable Mothers Day Weekend! I love you!!!!!
We sat andwatched him demo for hours, my daughter was a great sport and did whatever I wanted to do. He made us each a fragment charm and signed the back. I got one of the tags he made, signed, a metal tape demo he made, and he signed my TH bags.
Ibought many products from the Stampers Anonymous Booth and had two days of heaven. Deni bought me a beautiful necklace with charms inside from South Hill Designs. Thanks so much Deni Lynn for a memorable Mothers Day Weekend! I love you!!!!!
Monday, April 29, 2013
Tuesday, April 16, 2013
Pendulum clock from scratch
Jim, http://thegentlemancrafter.blogspot.com/ did a u-stream a week ago Sunday. He decided to make a copy of a pendulum clock he had bought. He made the shell on u-stream and I followed his directions. (If you've never been to Jim's blog, check it out, he is so talented and a very good teacher.) Well, after I had the shell done, I got impatient and could not wait to see how Jim would finish his. I ventured out on my own and completed the clock this evening. It's fully functional, the first clock I ever did from scratch.
The shell is made out of medium weight chipboard doubled. I covered it with paper from Graphic 45 (french country collection)'
The pendulums were made out of Tim Holtz grunge board, I cut the circles with a sizzix die (circles #2) I used TH distress ink (festive berries) TH distress stain (wild honey) and TH distress paint (forest moss) then sprayed them with goose bumps to make them kind of shiny.
The numbers are TH grunge board (mixed mini's) colored with the distress ink (festive berries)
I added a dowel and put a bird on it.
I added a few of the stickers from the french country collection. Do you think it needs more embellishments, I'm not sure if I'm done with it yet. Sorry the pictures are not that good, as I took them at midnight.
Let me know what you think, you know it makes my day to read your comments. Have a great day! Shari
The shell is made out of medium weight chipboard doubled. I covered it with paper from Graphic 45 (french country collection)'
The pendulums were made out of Tim Holtz grunge board, I cut the circles with a sizzix die (circles #2) I used TH distress ink (festive berries) TH distress stain (wild honey) and TH distress paint (forest moss) then sprayed them with goose bumps to make them kind of shiny.
The numbers are TH grunge board (mixed mini's) colored with the distress ink (festive berries)
I added a dowel and put a bird on it.
I added a few of the stickers from the french country collection. Do you think it needs more embellishments, I'm not sure if I'm done with it yet. Sorry the pictures are not that good, as I took them at midnight.
Let me know what you think, you know it makes my day to read your comments. Have a great day! Shari
Sunday, March 31, 2013
March tag!
I finally got around to making my March tag for Tim Holtz 12 tags of 2013. If you don't know about Tim's 12 tags check it out here: http://timholtz.com/12-tags-of-2013-march/
I didn't have a lot of the supplies that he uses so I made do with what I have. the bunny die, so I found a picture of a bunny on line, printed it, traced it onto my labels die and cut it out. I also didn't have the tinsel twine, so I used glitter for my bunnies. Instead of the tapered fringe die I used my Martha Stewart scissors. I also didn't use the metal flowers and substituted other small flowers from my stash. I really had a good time making these tags, let me know what you think! I love your comments!!
Saturday, March 23, 2013
MY FIRST MIXED MEDIA CANVAS
I have been watching video's on You tube of different people doing mixed media canvas's. One persons video's really stood out to me, Leanne Luvleescrappin on you tube. I really like the stuff she does and thought I would give it a try.
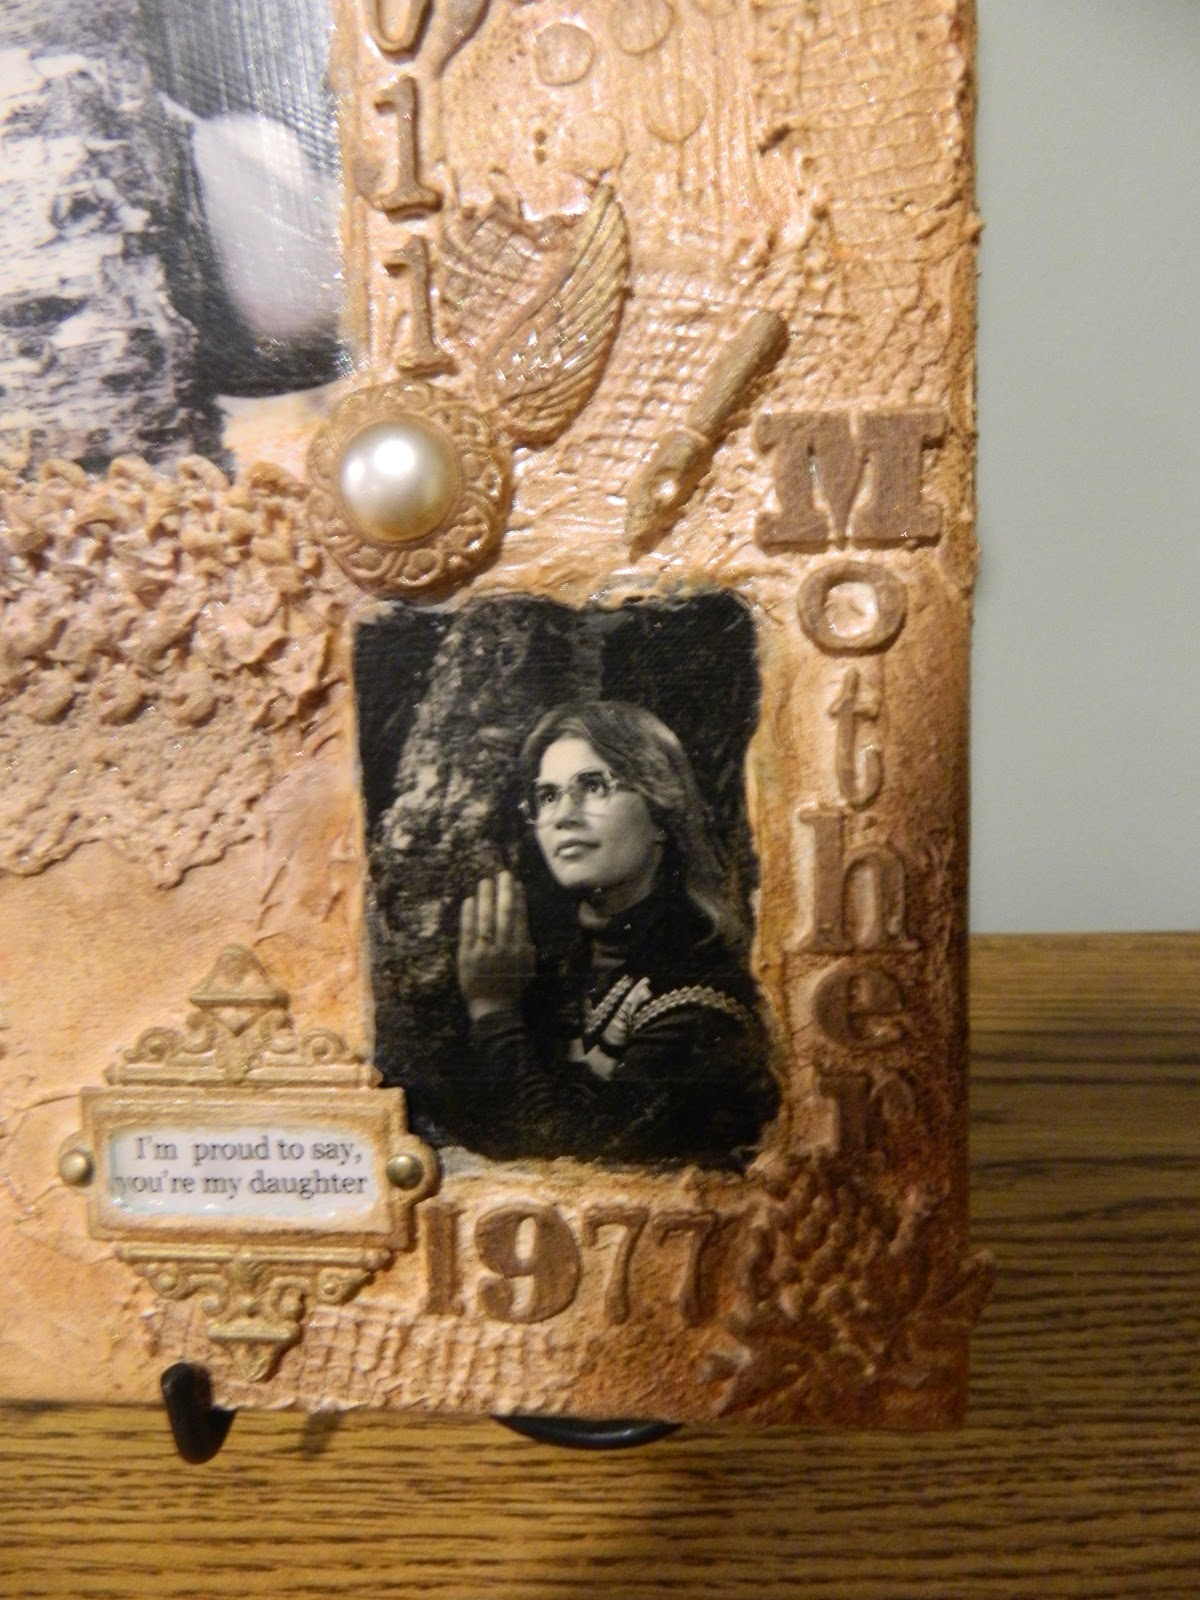
First I applied Gesso to my canvas. I added my pictures (one of my daughters senior pictures and then I thought it would be fun to add one of my senior pictures.) Yes that is me 36 years ago, Wow! Where has the time gone? When we went for my daughters senior pictures, I thought it was funny that they took her picture by some trees, I told her that when I had mine taken (many moons ago) I also had one by a tree.
Next I added some lace, and then I started with modeling paste. I used some dylusions stencils and some plastic mesh and applied the paste. Next I added some of Tim Holtz Alpha Parts for my title. The family plaque was something I had picked up at Michael's along time ago. Next I added some flowers from I am Roses and some Prima flowers. I added a hinge, some Tim Holtz items, locket keys, ornate plate ( with a saying I printed off my computer) some pen nibs and a few other misc. metal items.
I then took the Gesso and went over the whole thing. As you can see by the pictures, I think I got carried away with the Gesso on the flowers. They were way to stiff and after I started spraying I decided I didn't like them so I cut them off the canvas.
Next I started spraying different Glimmer Mists, by tattered Angels. I wasn't liking the looks of my canvas at all, but it got better the more I played around.
After I got a color I was somewhat happy with, I added my I am roses flowers and leaves that I had misted with the Glimmer Mist. I liked them better this time without the Gesso making them stiff.
Still not quite satisfied, I took some different distress inks and went over my letters. I also put some Vintage Photo re-inker and added water in a spray bottle and spritzed it more. Lastly I added the Tim Holtz clock face and hands on top of a piece of cork I had in my stash.
I found it very difficult to get good pictures of this, this is the best I could do.
The canvas is not quite what I had pictured, but I guess for my first try it is ok. What do you think, what does it need? Leave me a comment and make my day! Shari
First I applied Gesso to my canvas. I added my pictures (one of my daughters senior pictures and then I thought it would be fun to add one of my senior pictures.) Yes that is me 36 years ago, Wow! Where has the time gone? When we went for my daughters senior pictures, I thought it was funny that they took her picture by some trees, I told her that when I had mine taken (many moons ago) I also had one by a tree.
Next I added some lace, and then I started with modeling paste. I used some dylusions stencils and some plastic mesh and applied the paste. Next I added some of Tim Holtz Alpha Parts for my title. The family plaque was something I had picked up at Michael's along time ago. Next I added some flowers from I am Roses and some Prima flowers. I added a hinge, some Tim Holtz items, locket keys, ornate plate ( with a saying I printed off my computer) some pen nibs and a few other misc. metal items.
I then took the Gesso and went over the whole thing. As you can see by the pictures, I think I got carried away with the Gesso on the flowers. They were way to stiff and after I started spraying I decided I didn't like them so I cut them off the canvas.
Next I started spraying different Glimmer Mists, by tattered Angels. I wasn't liking the looks of my canvas at all, but it got better the more I played around.
After I got a color I was somewhat happy with, I added my I am roses flowers and leaves that I had misted with the Glimmer Mist. I liked them better this time without the Gesso making them stiff.
Still not quite satisfied, I took some different distress inks and went over my letters. I also put some Vintage Photo re-inker and added water in a spray bottle and spritzed it more. Lastly I added the Tim Holtz clock face and hands on top of a piece of cork I had in my stash.
I found it very difficult to get good pictures of this, this is the best I could do.
Subscribe to:
Posts (Atom)